Here we go - the Tower Pinwheel Card may just be the funnest of all the fun
folds! Hmmm...is funnest a word? If not it should be!
1st set of adjacent panels. The polar bear is mounted on a 2" x 4" piece
of embossed Shimmer Vellum. The adjacent panel is a 2-1/2" x 4" piece of
Basic White cardstock with a 2-1/4" x 3-3/4" piece of striped DSP.
2nd set of adjacent panels
3rd set of adjacent panels
The fourth panel provides a place to sign your card.
This version of the tower pinwheel card is sized to fit into a standard A2
envelope. My friend Cindy sent me the directions along with cardstock
for the base, the white panels and the embossed vellum. I had a stack of
penguins & polar bears already cut out on my desk, so with those and my
Penguin Place stamp set, I started crafting with wild abandon!
Here are the measurements for the A2 Tower Pinwheel Card:
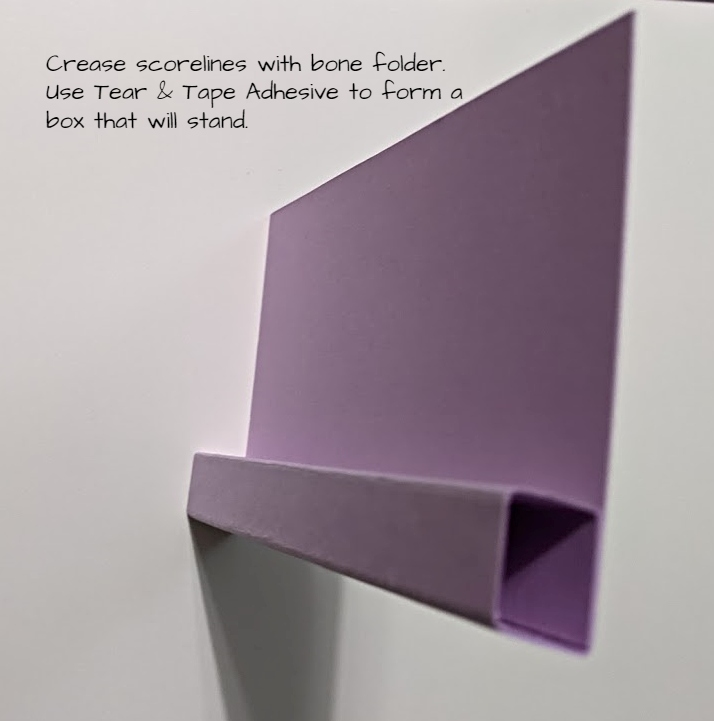
Fresh Freesia cardstock 4-1/4" x 4-3/4". This is the card base used for
scoring. Score the long side at 1/2", 1", 1-1/2" & 2".
Fresh Freesia cardstock 2-3/4" x 4-1/4" (3 pieces).
Designer Paper or cardstock of your choice - 4 pieces 2-1/2" x 4" and 4 pieces
2" x 4". I used Shimmer Vellum (embossed), Basic White cardstock and
Penguin Playmates DSP (retired).
This is the card base.
Step 1 - assembling the card base (photo courtesy of Cindy Brown).
Step 2 - add the 3 pieces of 2-3/4" x 4-1/4" cardstock to the sides of the box
(photo courtesy of Cindy Brown).
Step 3 - this is a top view of the card base fully assembled (photo courtesy
of Cindy Brown).
Decorating Tips:
Don't try to decorate the panels before assembling the card base.
Four of the panels are more narrow than the other four - this will become
evident after the base is assembled.
Avoid using gems, pearls, bows, etc. if you want to fold this card for
mailing!
Have fun with this - I know I did!
Product List


 The images are colored with Stampin' Blends markers - Soft Succulent, Soft
Suede, Pool Party, Ivory, Smoky Slate, Highland Heather, Daffodil Delight and
Crumb Cake.
The images are colored with Stampin' Blends markers - Soft Succulent, Soft
Suede, Pool Party, Ivory, Smoky Slate, Highland Heather, Daffodil Delight and
Crumb Cake.


 Designer Series Paper")


 Specialty Designer Series Paper")

")


")
 Designer Series Paper")


