Thursday, June 29, 2017

Christmas Cards Made Easy!

Hi Friends,

I started working on my Christmas cards this week, and wanted to show you how I used some leftover materials from my November 2016 Paper Pumpkin kit.  This is such a cute kit!  The projects were beautiful the way they were designed, but I had some other ideas in mind.  What do you think of this?


Here is one of the cards that I made following the instructions in the kit:


 I love this design, but wanted to use the kit materials to make a standard A2 size card.


I made my card base from Dapper Denim cardstock.  On top of that, I layered a 4" x 5-1/4" piece of Whisper White and used a circle die to cut a 3-1/4" circle.  Next I ran it through my Big Shot using the Softly Falling Embossing Folder.    I arranged the pre-cut houses, trees & snowbanks from the kit behind the Whisper White card front and attached them with Multipurpose Liquid Glue.  I wrapped a piece of silver/white baker's twine around the card front twice before attaching the entire piece to the card base using Tear & Tape Adhesive.  Tear & Tape is the best adhesive to use for any textured or embossed cardstock!


 "Merry Christmas" was stamped in Dapper Denim and die-cut with the Layering Ovals.  The sentiment was attached with Stampin' Dimensionals.  I dotted snowflakes in the sky with a glue pen and sprinkled them with Dazzling Diamonds Glitter.


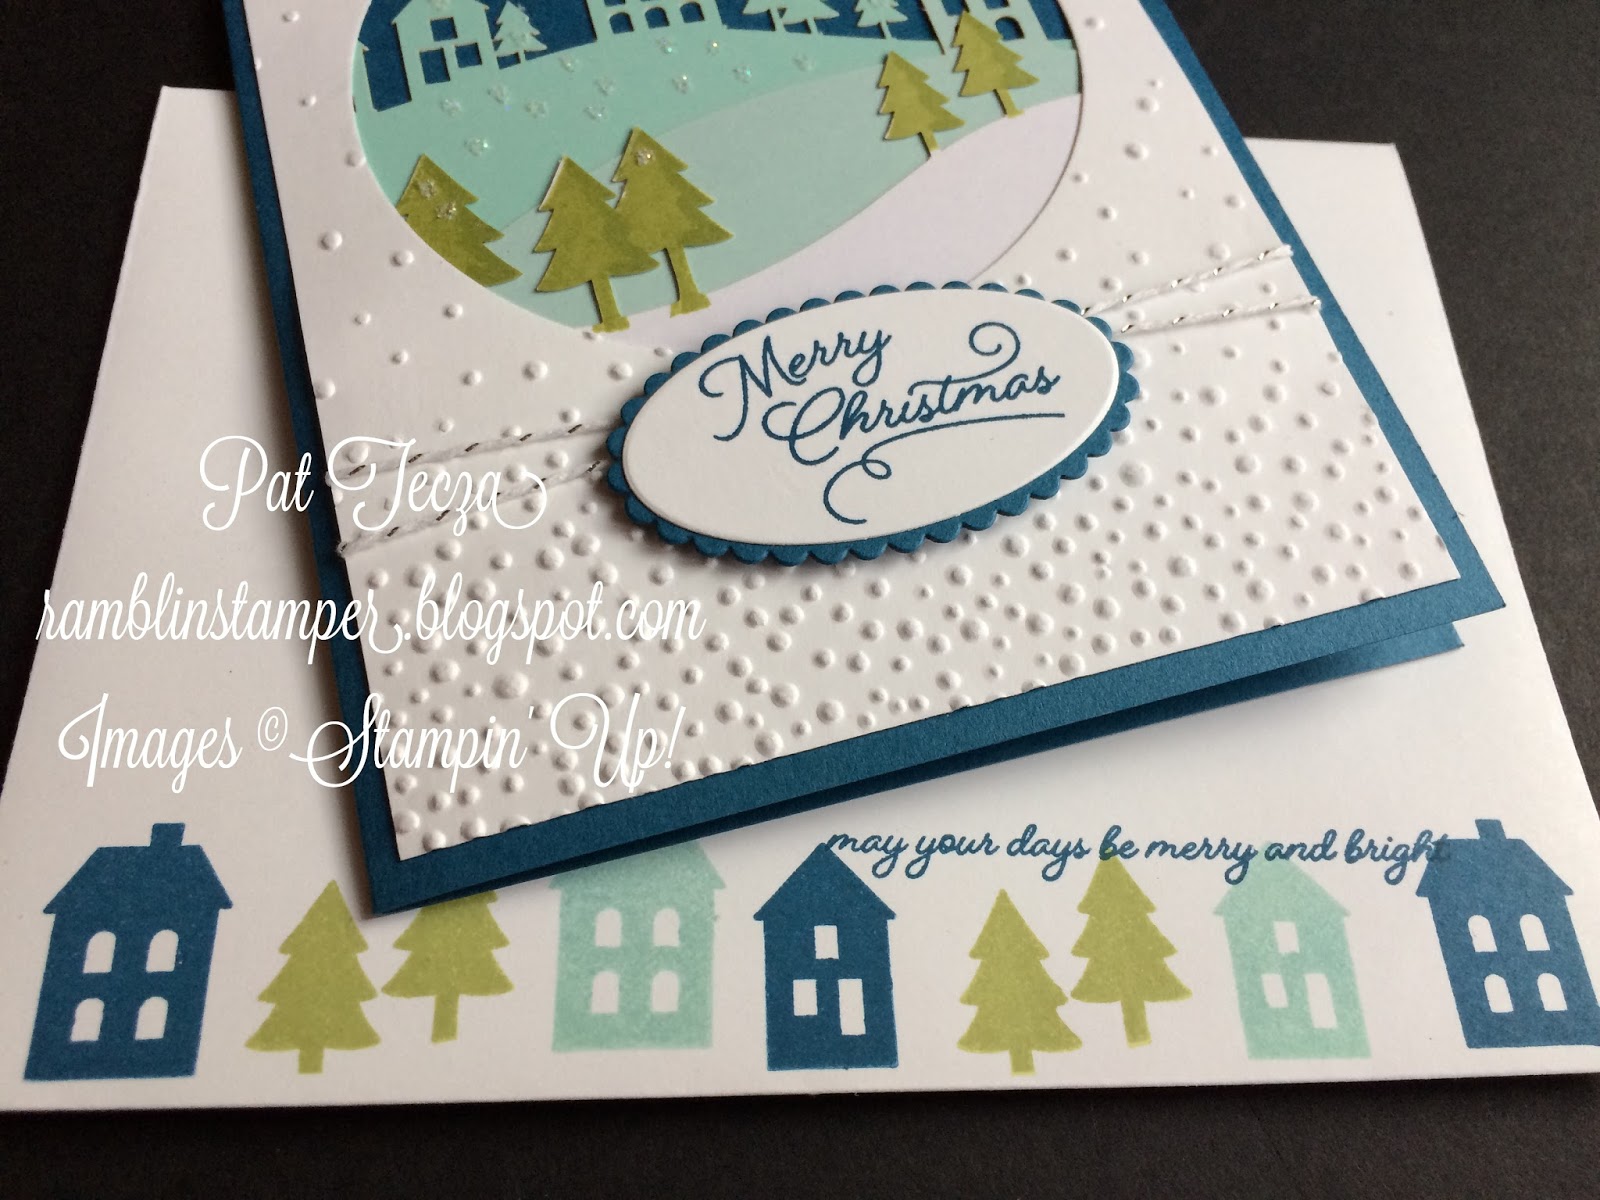
Stamps from the kit decorate the envelope beautifully using Dapper Denim, Pool Party & Pear Pizzazz inks.


The inside of the card is finished in the same colors.  The sentiment is from the Holly Berry Happiness stamp set.  


A strip of Thick Whisper White cardstock cut & folded into a "Z" shape is all that's needed to repurpose your empty Paper Pumpkin boxes:


How great is that?  The empty boxes make a perfect way to store your cards until you're ready to mail them!  This box has 24 cards & envelopes with room for more.  

Don't have any PP boxes?  This is the time to try it out!  For 24 hours only, new Paper Pumpkin customers can receive their first-month subscription for only $5.  That's a crazy 75% off the regular price!  Visit paperpumpkin.com from June 29 at 11:59 p.m. to June 30 at 11:59 p.m. and use promo code ONEDAY0717  to get your first kit at this incredible price.  


Product List

Creatively yours,
Pat


Tuesday, June 27, 2017

Star of Light

Hi Stampers,

My customers tell me time and time again that their favorite cards to make are for Christmas and birthdays.  The best time to work on your holiday cards is NOW - when you are relaxed and able to enjoy the creative process.  Waiting until December and working under stress takes all the joy out of stamping.  We've all been there, right?  This year, let's do it right and have all our cards ready to mail by Thanksgiving!

Last Sunday was the 25th of June - exactly six months until Christmas.  It was also the day of my first Christmas card class!  These are some of the cards we made:


 We were working with the Star of Light stamp set & the Starlight Thinlits.  I'm loving the fresh new In-Colors for this year and wanted to incorporate them into this class.  Christmas cards in non-traditional colors are some of my favorites!  This one uses Lemon Lime Twist for the card base.  The blue is Dapper Denim - this has become my go-to shade of blue.


I think my favorite stamp in this set is the "swirly swoosh" on the background.  I'm not really sure what to call it, but that seems to work. It's so simple, yet so elegant.


The star is three separate layers made with the die-cuts included with the Thinlits.  The first layer is Dapper Denim, the second layer is Lemon Lime Twist and the third layer is cut from Dazzling Diamonds Glimmer Paper.  I adhered the layers together with Multipurpose Liquid Glue.  Use it sparingly - a little dab will do ya!


 The white panel on the card front is 3" x 5".  Five rhinestone jewels add even more sparkle.


Here's a different version of this card using Fresh Fig cardstock and ink.  The front panel on this one is 3" x 5-1/2".  A strip of Copper Foil cardstock separates the front panel from the card base.


The 3 layers of the star are Fresh Fig, Whisper White and Copper Foil.


One more version of this card uses Dapper Denim for the card base.  All of the stamping is done in Dapper Denim except for the "swirly swoosh", which is stamped in Marina Mist.


 This star has just 2 layers - Dapper Denim & Copper Foil.


This is how I finished the inside of my cards.  There you have it, three different looks using the Star of Light stamp set & Starlight Thinlits.  Which is your favorite?

Stop by again soon - I'll be showing more holiday ideas in the weeks to come, including a sneak peek at a brand new bundle available in August - Carols of Christmas!


Product List

Happy stamping,
Pat


Thursday, June 22, 2017

The Wait is Over!

Hi Friends,

I hope you've enjoyed these projects I've posted the past few weeks using the Daisy Delight Bundle.


The long-awaited Daisy Punch is finally available!  They are back in stock today.  By now you've probably seen dozens of beautiful projects created by demonstrators who had early access to this beautiful new stamp set & punch before they sold out.  This bundle has been so popular with demonstrators that they were sold out even before the new catalog went online!  I'm predicting that this shipment will go fast, so if you've been waiting to get your hands on this set, don't delay - order today!

Happy stamping,
Pat


Tuesday, June 20, 2017

Daisies from the Farmers Market

Hi, Friends!

I am having so much fun playing with the new In-Colors!  I love experimenting with different combinations to see what works.  One of my favorites is Powder Pink paired with Smoky Slate.


So soft and lovely!  Smoky Slate is one of my favorite neutral colors - everything looks good with it.  It's the "little black dress" of cardstock!   I used 2 of my favorite new bundles on this project - Wood Words and Daisy Delight.


"Thank You" & "Farmer's Market" are stamped in Basic Gray.  The daisy stems are stamped in Old Olive and the smaller flower stems are stamped in Pear Pizzazz.  The small daisies are a 2-step stamp:  the solid background is stamped in Powder Pink and the outline stamp is done in Flirty Flamingo.  The large daisy is stamped in Powder Pink and the center is Flirty Flamingo.


I stamped the stems first, placing them so they would look as if they are tucked inside the crate.  The crate is made with the Wood Textures Designer Series Paper Stack and die-cut using the Wood Crate Framelits, which are included in the Wood Words Bundle.  The center daisy is stamped on the card front; the other 2 are stamped once to show placement for the fussy-cut images.


See how the small daisies on the left & right are popped up?  I love adding dimension to cards this way.  The petals on the large flower were rolled around a pencil to shape them and a Dimensional behind the center pops it up too.  Five rhinestone jewels add sparkle!


The large daisy is actually 2 punched daisies layered on each other and attached in the center with a drop of liquid glue.


I liked this design so much, I decided to try it with bolder colors too.  Here I've used Berry Burst, Crushed Curry and Dapper Denim.  


Two of the smaller daisies are popped up with Dimensionals on this card, too.  Glitter Enamel Dots in coordinating colors add sparkle!


New In-Colors for 2017-2019 - what will you make with your favorites?

Product List

I'd love to hear your comments about your favorite colors.  Thanks for stopping by today!

Pat