Showing posts with label Festive Friday Challenge. Show all posts

Thursday, May 30, 2024

More Alternative Designs for "The Best There Is" Paper Pumpkin

 Hi!  Sharing some more ideas with you from the most recent Paper Pumpkin kit - "The Best There Is" (May 2024).

On this one I used the add-on dies that are available to cut "thanks".  I cut 2 of these and glued them together to make it thicker.  Also added a circle of Pool Party cardstock behind the trees, and matted the beautiful chevron designer paper with Misty Moonlight.

This card is a good fit for the Festive Friday Challenge #FF0160.  I'm using Masculine Colors, Wood Elements and Thanks Sentiment.


Sunday, October 1, 2023

Christmas Wreath Quilt Square - Five Ways

It's only September and  I've already finished most of my Christmas cards for this year.  Big yay!  Ever since I discovered how much I enjoy making quilt squares from paper, I'm always looking for new ways to incorporate them into my cards. 

I had so much fun designing this Christmas Wreath Quilt Square that I ended up making a bunch of them.  Here's how I used them to embellish my Christmas cards--


I kept this one pretty simple by mounting it on a brick "wall".  The embossing is done with a (retired) pine bough folder.


This one is a little more rustic.  The embossing was done with a gingham folder.  I like the addition of "Joy" in the middle, don't you?  


This one might be my favorite...


This diamond-fold really lends itself well to show off a quilt square!


This one uses a template from Robin Armbrecht called 4 Lovely Layers Template #19.  Such a great way to show off our beautiful designer papers!

I'm sharing this design at the Festive Friday card making challenge.  Green, sparkle & triangles are my elements.


Except for the diamond fold card, each of my cards (including the wreath) uses the gorgeous Joy of Christmas Designer Series Paper.  This paper has been so popular that it is currently sold out, but scheduled to be back in stock the week of October 16.  Until then, try making your wreath with your favorite red & green designer papers in your stash! 

If you want to try your hand at making the Christmas Wreath Quilt Square, please click below to download the template and let me know how it turns out!


Product List


Monday, May 16, 2022

Inspired by a Card Challenge

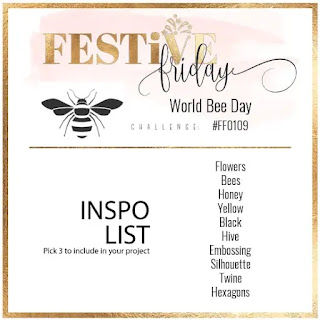
 I always check out the weekly challenges from Festive Friday and this week I was totally inspired!   


The Design Team liked my card too...it was a Festive Friday Favorite!


I love the clean, crisp look of yellow & black together.  My card uses those colors, plus embossing and flowers.  The measurements for this Triple Flap Gatefold Card came from my friend Beth Daniels - thanks Beth!


Card base- Basic Black 8-1/2" x 5-1/2".  Score at 2-1/8" on the long side (See Pro Tip below!)
Inside of card - Basic White 4" x 5-1/4"
Designer Paper - 2" x 5-3/8" (cut 2)
Triple Flaps - Basic White 1-1/2" x 3-3/4" (cut 3)
Mat Behind Triple Flaps - Basic Black 1-5/8" x 3-7/8" (cut 3)

Pro Tip:

Score & fold the gatefold card base at 2-1/8".  Without scoring, fold the other side in so that the edges are perfectly aligned in the middle and score using a Bone Folder.  This assures you will never have a gap in the center of your gatefold card.


The flowers are stamped in Daffodil Delight, stems & leaves are Pear Pizzazz and the flower centers are Early Espresso.  "Sending" is heat embossed in white on Basic Black cardstock and die-cut.  I use my Stamparatus (always!) to get the sentiment perfectly straight.


I love that Sending Smiles has so many different sentiments included, making this such a versatile stamp set!


Here's another version that uses some Daffodil Afternoon Designer Paper (retired).  


Assembly Tips:

Stamp and layer the 3 panels together.  On the back of each panel, measure the center (about 1-7/8") and make a pencil mark.  The top & bottom panels get liquid glue on the left half.  Be careful to keep the glue about 1/4" away from your pencil mark.  Attach these 2 panels, centering them left & right.  Last, use liquid glue on the right half of the "Sending" panel and adhere it spaced equally between the other 2 panels.

I hope you will try this fun card!  Here are the supplies I used --


Monday, August 31, 2020

Easy Shaker Card

 Hello Stampers!

I made this shaker card for the new Festive Friday Challenge #FF0066 - National Day of Encouragement (September 12).  I used 4 items off the Inspo List - bright colors, heart, sparkle & pretty paper.


I've tried a bunch of different methods for making shaker cards, but this is my far my favorite.  And it's the easiest.  Win-win!  This is a 5-1/2" square card (don't forget extra postage required!). 

Card Base - Pacific Point cardstock 11" x 5-1/2", scored at 5-1/2"

Designer Paper - 5-1/4" x 5-1/4"

Adhesive Foam Sheet - 5-1/4" x 5-1/4"

Window Sheet - 5-1/4" x 5-1/4"

Embossed Card Front - Pacific Point cardstock 5-1/2" x 5-1/2"


These adhesive foam sheets can be found in the children's section of most craft stores.  This pack contains 6 sheets in red, blue, yellow, green, black & white.  They make shaker cards easy, and by matching the foam color to your card, it practically disappears!


This is how my shaker card is built:


Cut the designer paper & the foam sheet to 5-1/4" square.  Die-cut a circle in the center of the foam sheet - the circle here is 4-3/4".  Yours could be smaller depending on how much of the designer paper you want to show.  The adhesive comes only on one side of the foam - on the non-adhesive side, add liquid glue as seen here.  Flip it over and adhere to the designer paper.

Now the self-adhesive side of the foam is facing up.  Add your shaker sequins to the center of the circle.  These are random sequins from my craft stash - I love using up supplies that have been around a while!

Now remove the adhesive from the foam sheet and place your 5-1/4" square piece of window sheet on top of the foam and press the edges down well.  Using liquid glue, adhere this entire piece to the card front (window sheet facing up).

The circle on the embossed card front is slightly smaller than the inside circle.  Mine is 4-1/2".  Cut the circle first, then run through your embossing folder.  The sea turtles are fussy-cut from the Whale of a Time Designer Paper.  This card is for my 2-year old granddaughter - I think she'll have a whale of a time shaking it!

Thanks for visiting my blog today!  Here are the Stampin' Up! products I used on this card - you may purchase your own by clicking on any of the links below.  I appreciate you shopping with me!

Product List